The goal is not to force Windows 11 onto every older PC. The goal is to find out whether the machine can be upgraded safely, whether it should be clean-installed, or whether an unsupported route creates more risk than value.
Microsoft’s minimum requirements include a compatible 64-bit processor with at least two cores, 4 GB RAM, 64 GB storage, UEFI with Secure Boot capability, TPM 2.0, DirectX 12-compatible graphics with a WDDM 2.0 driver and a 720p display larger than 9 inches. These are only absolute minimums, not a guarantee that the PC will feel good to use. Low RAM, a small or slow SSD, old drivers and missing manufacturer support can still make Windows 11 slow or unstable.
Regular support for Windows 10 ended on October 14, 2025. The PC can still boot after that date, but Microsoft no longer provides normal technical help, feature updates or security updates outside its Extended Security Updates options. Microsoft’s Consumer Extended Security Updates (ESU) for home users is only a temporary security option for Windows 10 version 22H2, not new features, product improvements or technical support, and enrollment is limited until October 13, 2026. That makes it important to choose between supported Windows 11, ESU, another operating system or a newer machine based on risk and how the PC is used.
1. Check whether the PC is supported first
If Windows starts: go to Settings > Windows Update and see whether Windows 11 is offered there. Also run Microsoft’s PC Health Check app to see which requirement is missing, if any. Note that PC Health Check does not verify graphics and display requirements, so a very old or unusual machine can still have driver or display problems even if the main requirements look fine. Press Start, type `msinfo32`, and open System Information. BIOS Mode should be UEFI, and Secure Boot State should be On or at least possible to enable. Type `tpm.msc` to check whether TPM exists and whether the specification version is 2.0.
If Windows Update or PC Health Check says the machine is supported, use a supported upgrade first. If CPU, TPM, Secure Boot or UEFI blocks the upgrade, write down the exact blocker before changing BIOS settings or trying a workaround. Decide whether the machine is worth an unsupported installation, and whether an SSD or RAM upgrade should be done first.
2. Back up and find the BitLocker key
Before you upgrade, create a USB drive, change BIOS settings or start a clean install: copy documents, photos, desktop files, accounting files, browser data and other important folders to an external drive or cloud storage. Open a few files from the backup afterwards so you know the copy actually works.
Check BitLocker before touching TPM, Secure Boot, UEFI, RAID/AHCI or partitions. Look for a lock icon on the C drive, Device encryption under Settings > Privacy & security, or BitLocker in Control Panel. Find the recovery key first, for example through `https://aka.ms/myrecoverykey`, a work or school account, a printout or a USB drive. If the key is missing, stop. A BIOS change can make Windows ask for the 48-digit key before you get back in.
If the files are important and you are unsure about backup, drive health or BitLocker, this is a good point to bring the machine to EasyPC for a free diagnosis. We can assess the risk before anything is done that might lock or delete data.
3. Use a supported upgrade when the machine allows it
On a supported PC, the best order is: back up, connect the charger, check Microsoft’s Windows release health / known issues page, update drivers and BIOS only when the manufacturer recommends it, and try Settings > Windows Update. Microsoft recommends waiting until Windows Update offers Windows 11 first, because a missing upgrade can mean a temporary compatibility hold, known issue or manufacturer driver block. If the machine is still compatible and you have a backup, use Microsoft’s Windows 11 Installation Assistant on x64 PCs already running Windows 10 version 2004 or later.
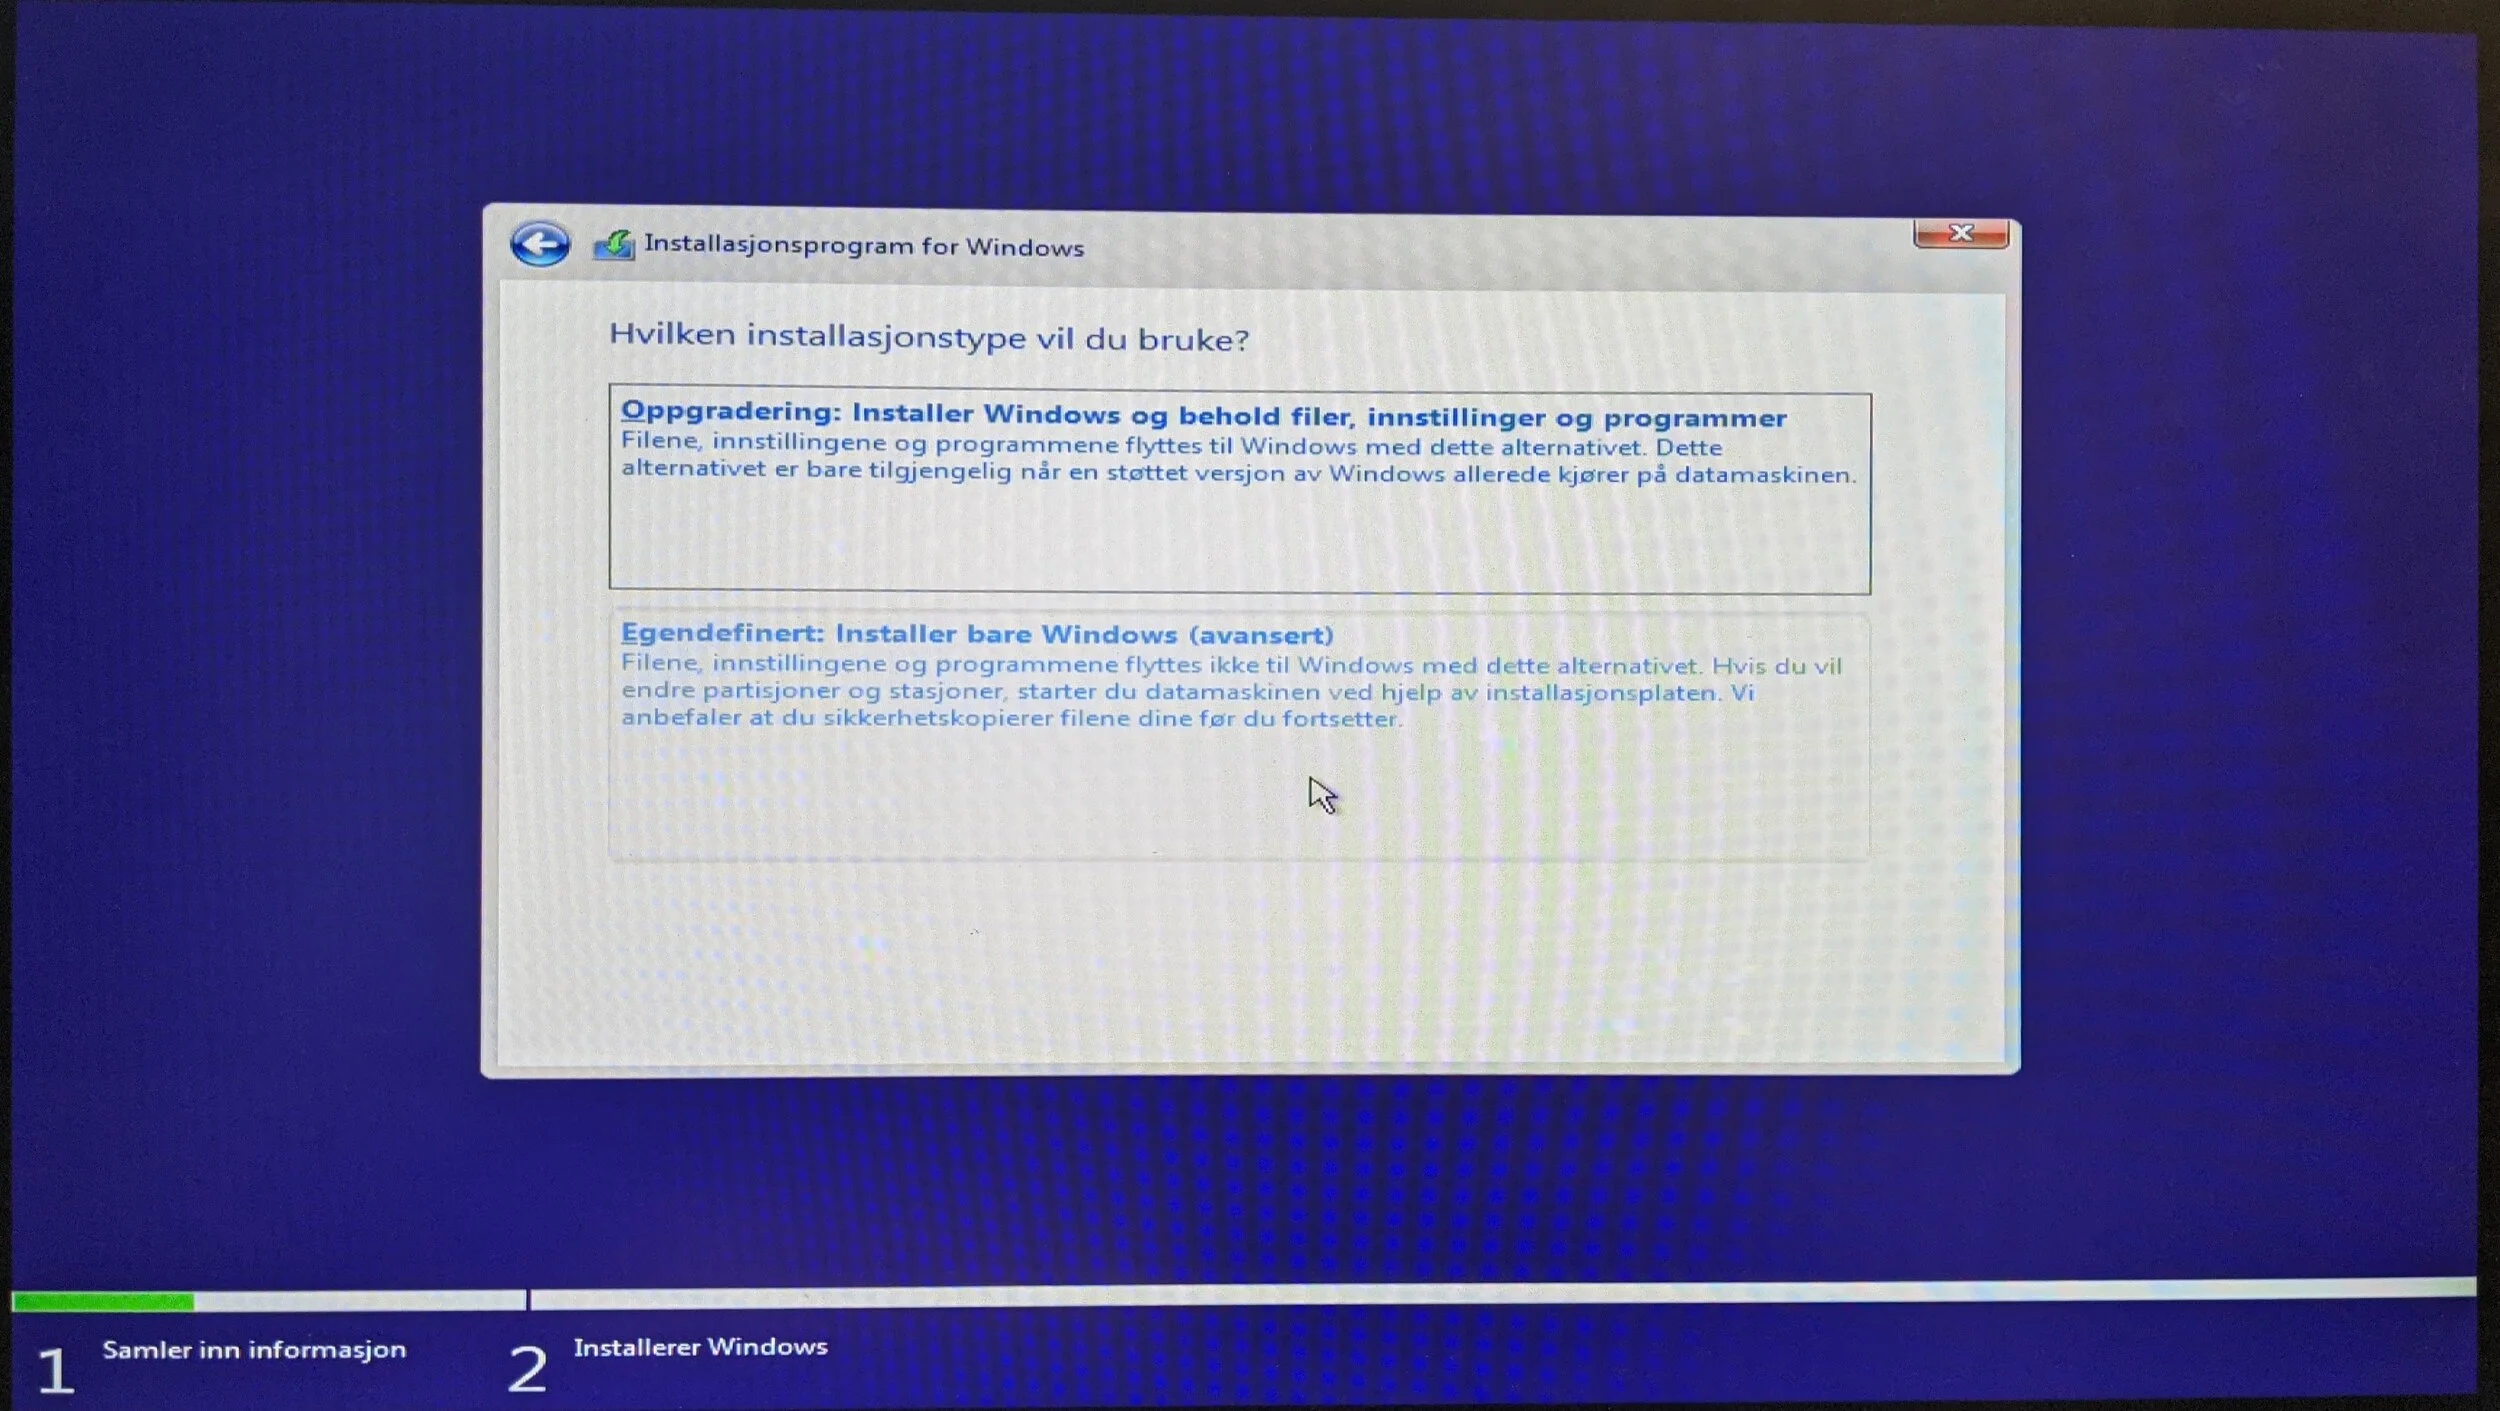
A supported in-place upgrade should show that personal files and apps will be kept before you select Install. If the choice changes to keeping only files, or nothing, stop and find the reason. Wrong installation media language, wrong Windows edition, too little free space or 32-bit Windows can prevent apps and files from being kept.
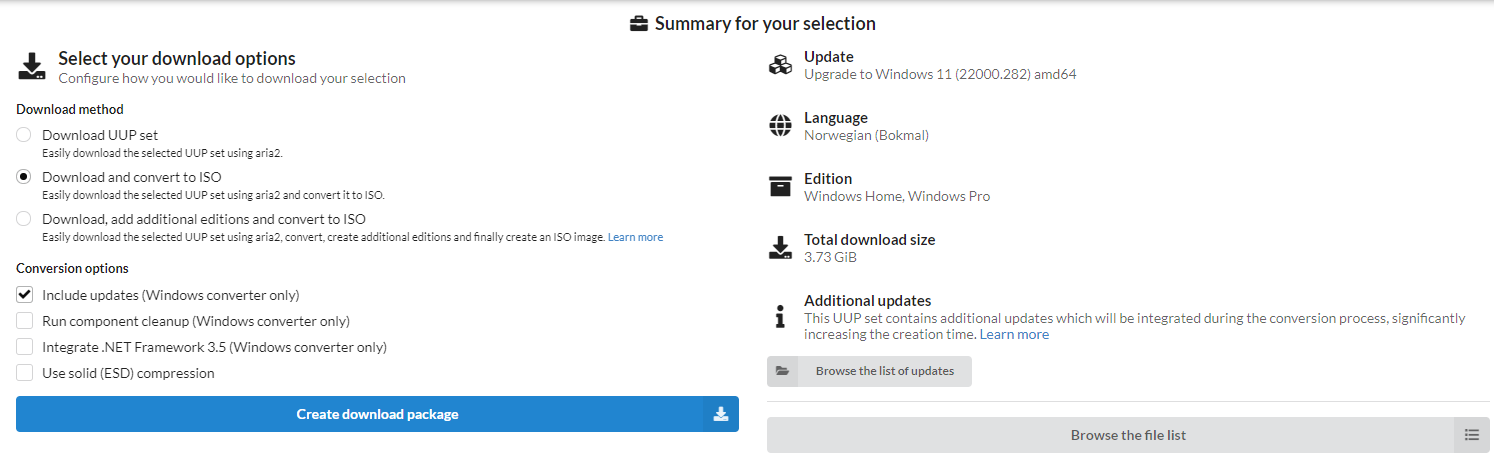
If you use an ISO, download it from Microsoft’s Windows 11 page on the day you install. Choose the correct language, mount the ISO from Windows when the goal is an upgrade, and use Microsoft’s Verify your download / SHA256 check if the file will be reused or you are unsure about the download. Modified ISO files and random USB drives can make security, drivers, activation and troubleshooting harder.
4. If the PC is not supported
Microsoft does not recommend installing Windows 11 on machines that do not meet the minimum requirements. Those machines do not receive Microsoft support, can have compatibility issues and are not guaranteed to receive updates. That is true even if the installation appears to work afterwards.
Use unsupported Windows 11 only when you accept the risk and have a way back. For a machine used for work, school, banking, accounting or customer data, supported hardware, extended Windows 10 support or a newer machine is often the better choice. For a spare PC it may be acceptable, but only after backup and with the expectation that drivers or future updates can fail.
If Windows 11 is already installed on an unsupported PC and the machine is unstable, Microsoft recommends going back to Windows 10. Use Settings > System > Recovery > Go back if the option exists. It is normally available only for 10 days after the upgrade, and an unsupported installation may also show a watermark or warning in Settings.
5. In-place workaround: setup.exe /product server
There is an unofficial in-place method where Windows 11 Setup is started from the existing Windows installation with the command `setup.exe /product server`. On some installation media, it can bypass parts of the Windows 11 check while still offering to keep files and apps. This is not Microsoft’s supported upgrade path for a normal Windows 11 client, and Microsoft can change or block the behavior later.
The safest way to try it is: download the Windows 11 ISO from Microsoft, right-click the ISO and choose Mount, or open the official USB drive in File Explorer. Open Terminal or Command Prompt as administrator, go to the correct drive letter, for example `D:`, and run `setup.exe /product server`. Run this from Windows, not by booting the PC from USB, if the goal is to keep files and programs.
Read every setup screen carefully. Setup may show server-related text because of the parameter. Stop if it actually offers the wrong product, wrong language, wrong edition, a clean install, or does not let you keep apps. On the Ready to install screen, it must say that personal files and apps will be kept. If it says Nothing, or only personal files, choose Change what to keep. If the correct choice is not available, cancel.
If the compatibility check fails after Setup downloads updates, some users get further by choosing not to download updates right now and running Windows Update afterwards instead. This makes the method even more dependent on the drivers and hardware already present, so use it only when backup, BitLocker key, stable drive and rollback plan are in place. Do not use it as a permanent plan for banking, work, accounting or customer data without accepting that Microsoft does not support the installation.
6. BIOS, TPM and Secure Boot: do not change settings randomly
On many PCs, TPM has another name in BIOS, such as Intel PTT or AMD fTPM. Enabling a TPM feature that already exists can be correct on supported hardware, but Secure Boot normally requires UEFI, and older installations may be set up in Legacy/CSM mode. Changing Legacy to UEFI, toggling Secure Boot or changing SATA mode between RAID and AHCI can stop the old Windows installation from booting, and can trigger BitLocker.
Write down or photograph the original BIOS settings before changing anything, and stop if the BitLocker key is missing. Do not update BIOS on battery power, an unstable machine or a suspected failing drive. If several settings must be changed just to make Windows 11 accept the machine, a free diagnosis at EasyPC is often safer than trial and error.
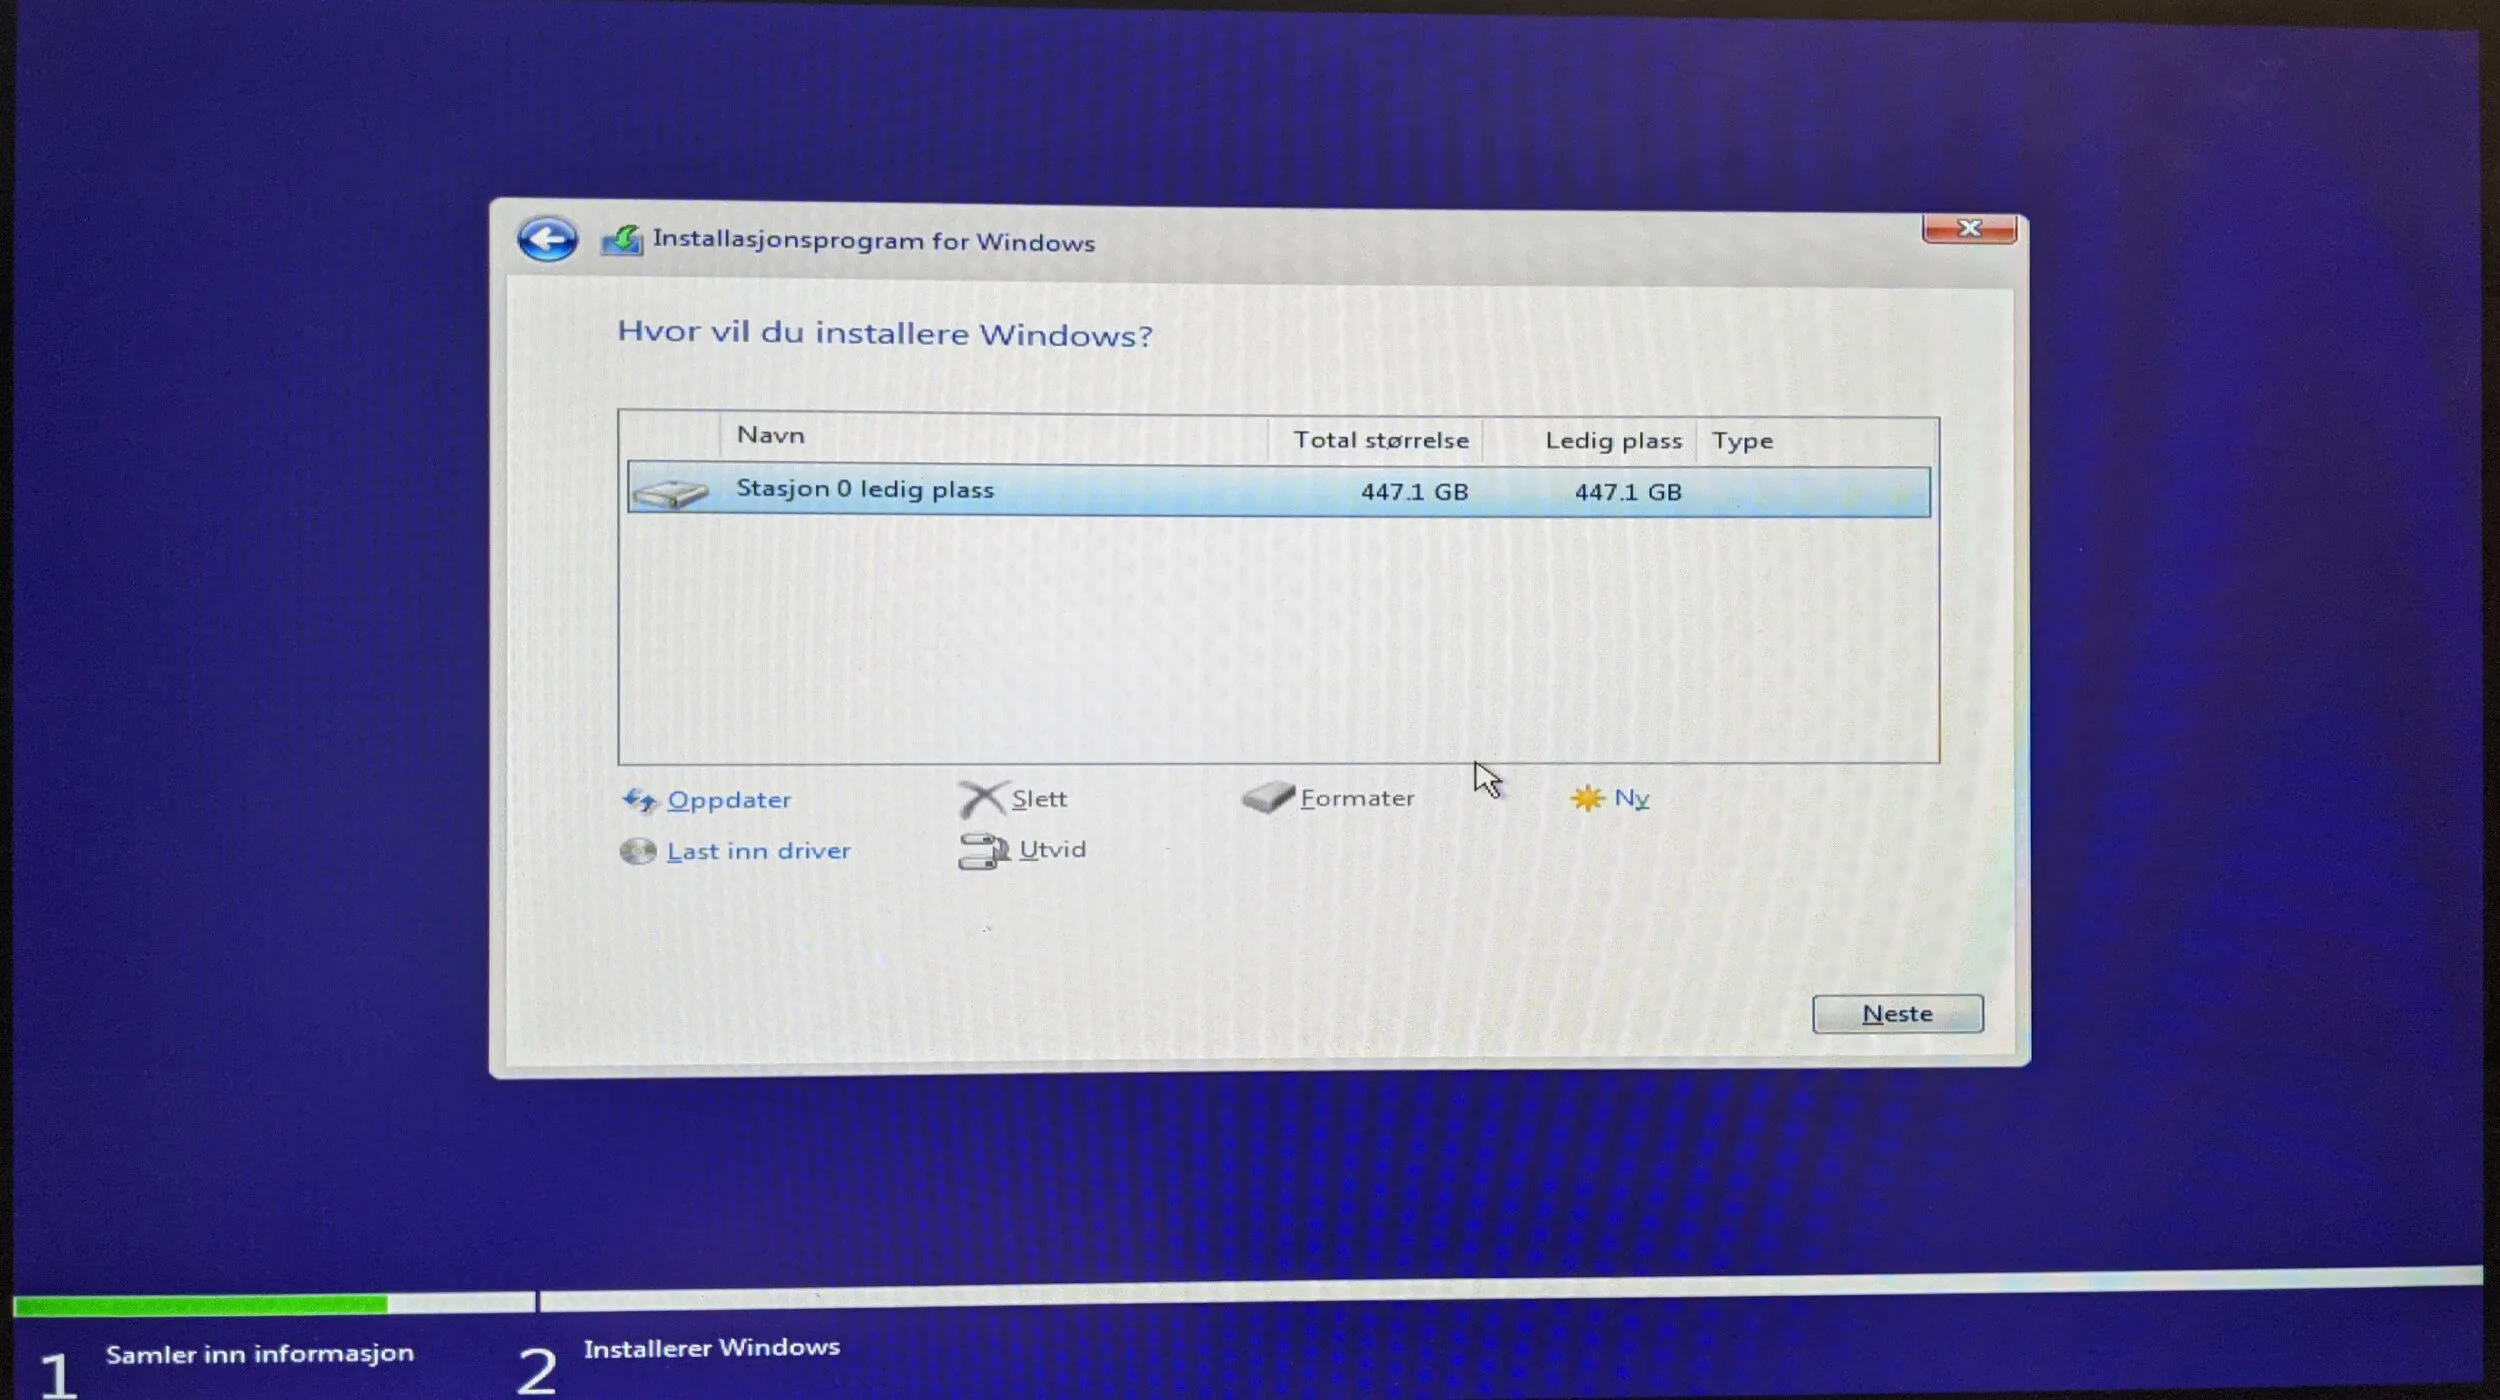
7. A clean USB install can easily erase the wrong disk
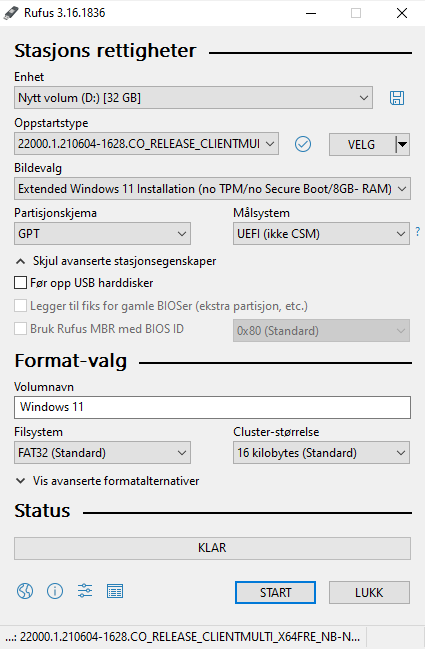
A clean install can be the right choice if Windows is damaged, you are replacing the SSD, or the machine should be set up from scratch. Create the installation media with Microsoft’s Media Creation Tool or an official ISO. The USB drive must be blank or safe to erase, and should be at least 8 GB.
To boot from USB, you often need to open the boot menu right after powering on the PC. Common keys are F2, F9, F10, F12, Esc or Delete. Choose the UEFI version of the USB device if it appears. Disconnect external drives that you are not installing to, so you do not choose the wrong drive.
When Windows Setup shows drives and partitions, delete only the partitions on the disk where Windows should be installed. Identify the disk by size, model and number of partitions. If you see several internal drives, an unknown BitLocker drive, or files that are not backed up, stop before selecting Delete or Format.
8. After installation or upgrade
Run Windows Update several times, check Optional updates for drivers, and get important drivers from the PC manufacturer if network, audio, camera, trackpad, graphics, sleep or battery behavior is wrong. If Wi-Fi is missing, use Ethernet, USB tethering from a phone, or download the driver on another PC.
Check activation under Settings > System > Activation. Test whether the PC wakes from sleep, whether the fans behave normally, and whether the machine receives new security updates. On an unsupported installation, also be prepared for a watermark, a warning in Settings, driver failures or a later update that will not install.
After an in-place upgrade, there is normally a short rollback window: Settings > System > Recovery > Go back. Microsoft says Go back is normally available only for 10 days after the upgrade. Do not delete Windows.old, do not run cleanup that removes old Windows files, and do not reset the PC before the machine is stable and the files are checked. If the machine is unstable, do not wait until that period expires before considering rollback, clean install or another solution.
When to bring it in
Bring the PC in for a free diagnosis if the BitLocker key is missing, the drive shows signs of failure, the files are important, BIOS settings are unclear, the machine has several drives, or Windows 11 only works through a workaround. We can tell whether upgrade, clean install, SSD replacement, backup or a newer machine actually makes sense.