When replacing an old hard drive with a new SSD, the most important part is not the copy itself, but choosing the right method before anything is erased. You can copy only files, clone the whole drive, or reinstall Windows 11 and move the content afterwards.
The right choice depends on three things: whether the old drive is healthy, whether you need to keep programs and settings, and whether you have the BitLocker key and a backup. If the drive is unstable, data recovery matters more than making Windows boot from the new SSD immediately.
Also check the physical SSD type before buying parts or starting work: 2.5-inch SATA, M.2 SATA and M.2 NVMe are not the same, and some laptops use a shorter M.2 length such as 2242 instead of 2280. The new SSD should have room for the used data, Windows, updates and some free working space. If you are unsure about drive format, connector or whether the machine has several internal drives, a free diagnosis is safer than ordering by guesswork.
1. Choose the method: file copy, cloning or clean install
File copy is safest when you only need documents, photos, desktop, downloads and project folders. Cloning is best when the old Windows installation is healthy, the drive has no faults, and you want to keep programs and settings. A clean install is often best when Windows is messy, slow, infected or full of old errors.
Do not start with cloning just because you bought an SSD. A clone also brings old Windows problems, bad drivers, startup clutter and programs you may no longer need. If the goal is a fast and tidy machine, a new Windows 11 installation on the SSD plus file copy afterwards may be better.
2. Stop if the old drive may be damaged
Clicking sounds, a drive that disappears from Windows or BIOS, folders suddenly missing, extremely slow copying, blue screens or a message that the drive must be formatted are warning signs. Do not run chkdsk, reset, reinstall Windows or repeat cloning attempts if the files matter.
When there are signs of physical drive failure, the first goal should be securing the most important files to another drive. Every new boot and every new copy attempt can make an unstable drive worse. At EasyPC, you can bring in the machine or drive for a free diagnosis before deciding between data recovery, cloning or SSD replacement.
If Windows or Disk Management asks you to initialize or format the old drive when you connect it with a USB adapter, stop. Do not click Initialize, Format or Repair on a drive that should contain files. Take a photo of the message, note the drive size and model name, and have the drive assessed before doing anything that can overwrite partition information.
3. Check BitLocker, backup and accounts first
Many Windows 11 machines use Device Encryption or BitLocker. Before changing drives, changing BIOS settings or cloning, find the recovery key. It is a 48-digit number and may be in the Microsoft account at aka.ms/myrecoverykey, a work or school account, a printout or a USB drive. Without the key, the files can be inaccessible even when the drive itself works.
Also check cloud backup and external backup before opening the machine. In OneDrive, open the cloud icon by the clock, go to Settings > Sync and backup > Manage backup and check whether Desktop, Documents and Pictures are actually syncing. Open a few files from the backup before trusting it.
Check the OneDrive status icons in File Explorer before copying. A blue cloud means the file is online-only and cannot be opened without internet. A green circle with a white check mark means the file is marked Always keep on this device. If you need a local copy to an external drive, right-click important OneDrive folders, choose Always keep on this device first, and wait until the download is finished.
Windows Backup can help with selected folders, some settings, Wi-Fi passwords and an app list when you sign in with a personal Microsoft account. Check status in the Windows Backup app or Settings > Accounts > Windows backup. Remember that a free Microsoft account only has 5 GB of OneDrive storage, and work/school accounts do not behave the same way. Windows Backup is not a full drive clone: normal desktop apps, specialist software, local email, accounting data, game saves and folders outside the selected areas still need separate checking.
4. File copy when Windows still starts
If old Windows still starts, copy user files first: Desktop, Documents, Pictures, Videos, Downloads and folders you created yourself. Do not copy Windows, Program Files or Program Files (x86) as if that reinstalls the programs. Most programs must be installed again, and some programs need their data exported from inside the app first.
Robocopy can help with large file copies, but use it carefully. A safer example for a user folder is `robocopy "C:\Users\Name" "E:\Backup\Name" /E /XJ /R:2 /W:5 /LOG:E:\copy-log.txt`. `/E` includes subfolders, `/XJ` skips junction points that can otherwise create strange loops, and `/R:2 /W:5` prevents one bad file from holding the copy for hours. Consider running it first with `/L` to list what would be copied without copying anything.
Do not use `/MIR`, `/PURGE`, `/MOVE` or `/MOV` if you are only trying to recover files. Microsoft describes `/MIR` as mirroring that also deletes files in the destination that do not exist in the source, and `/MOVE` moves content away from the source after copying. Check the log; Robocopy return code 8 or higher means at least one failure occurred. Open random documents, photos and accounting files from the new copy before trusting it.
Look especially for data that does not always sit neatly in Documents: Outlook PST archives, old POP email, accounting software, photo libraries, code projects, game saves, scanner software, BankID setup, browser profiles and exports from specialist programs. Some apps must be opened and exported before the old Windows drive is retired.
5. Cloning when old Windows is healthy
Cloning is most relevant when the old drive is healthy, Windows starts normally, and the used space fits on the new SSD. Prefer a cloning tool from the SSD manufacturer or a known tool you trust. Before starting, disconnect external drives you do not need, note the BitLocker key, and double-check which drive is the source and which is the target.
If BitLocker is active, have the recovery key available before the final restart and before BIOS/UEFI changes. On a healthy machine, it can also make sense to suspend BitLocker temporarily while replacing the drive and booting from the SSD for the first time, then turn protection back on when everything is tested. An advanced command is `manage-bde -protectors -disable C: -rc 3`, which suspends protection for three restarts; `manage-bde -protectors -enable C:` enables it again. Do not do this on an unstable machine or without backup and the recovery key.
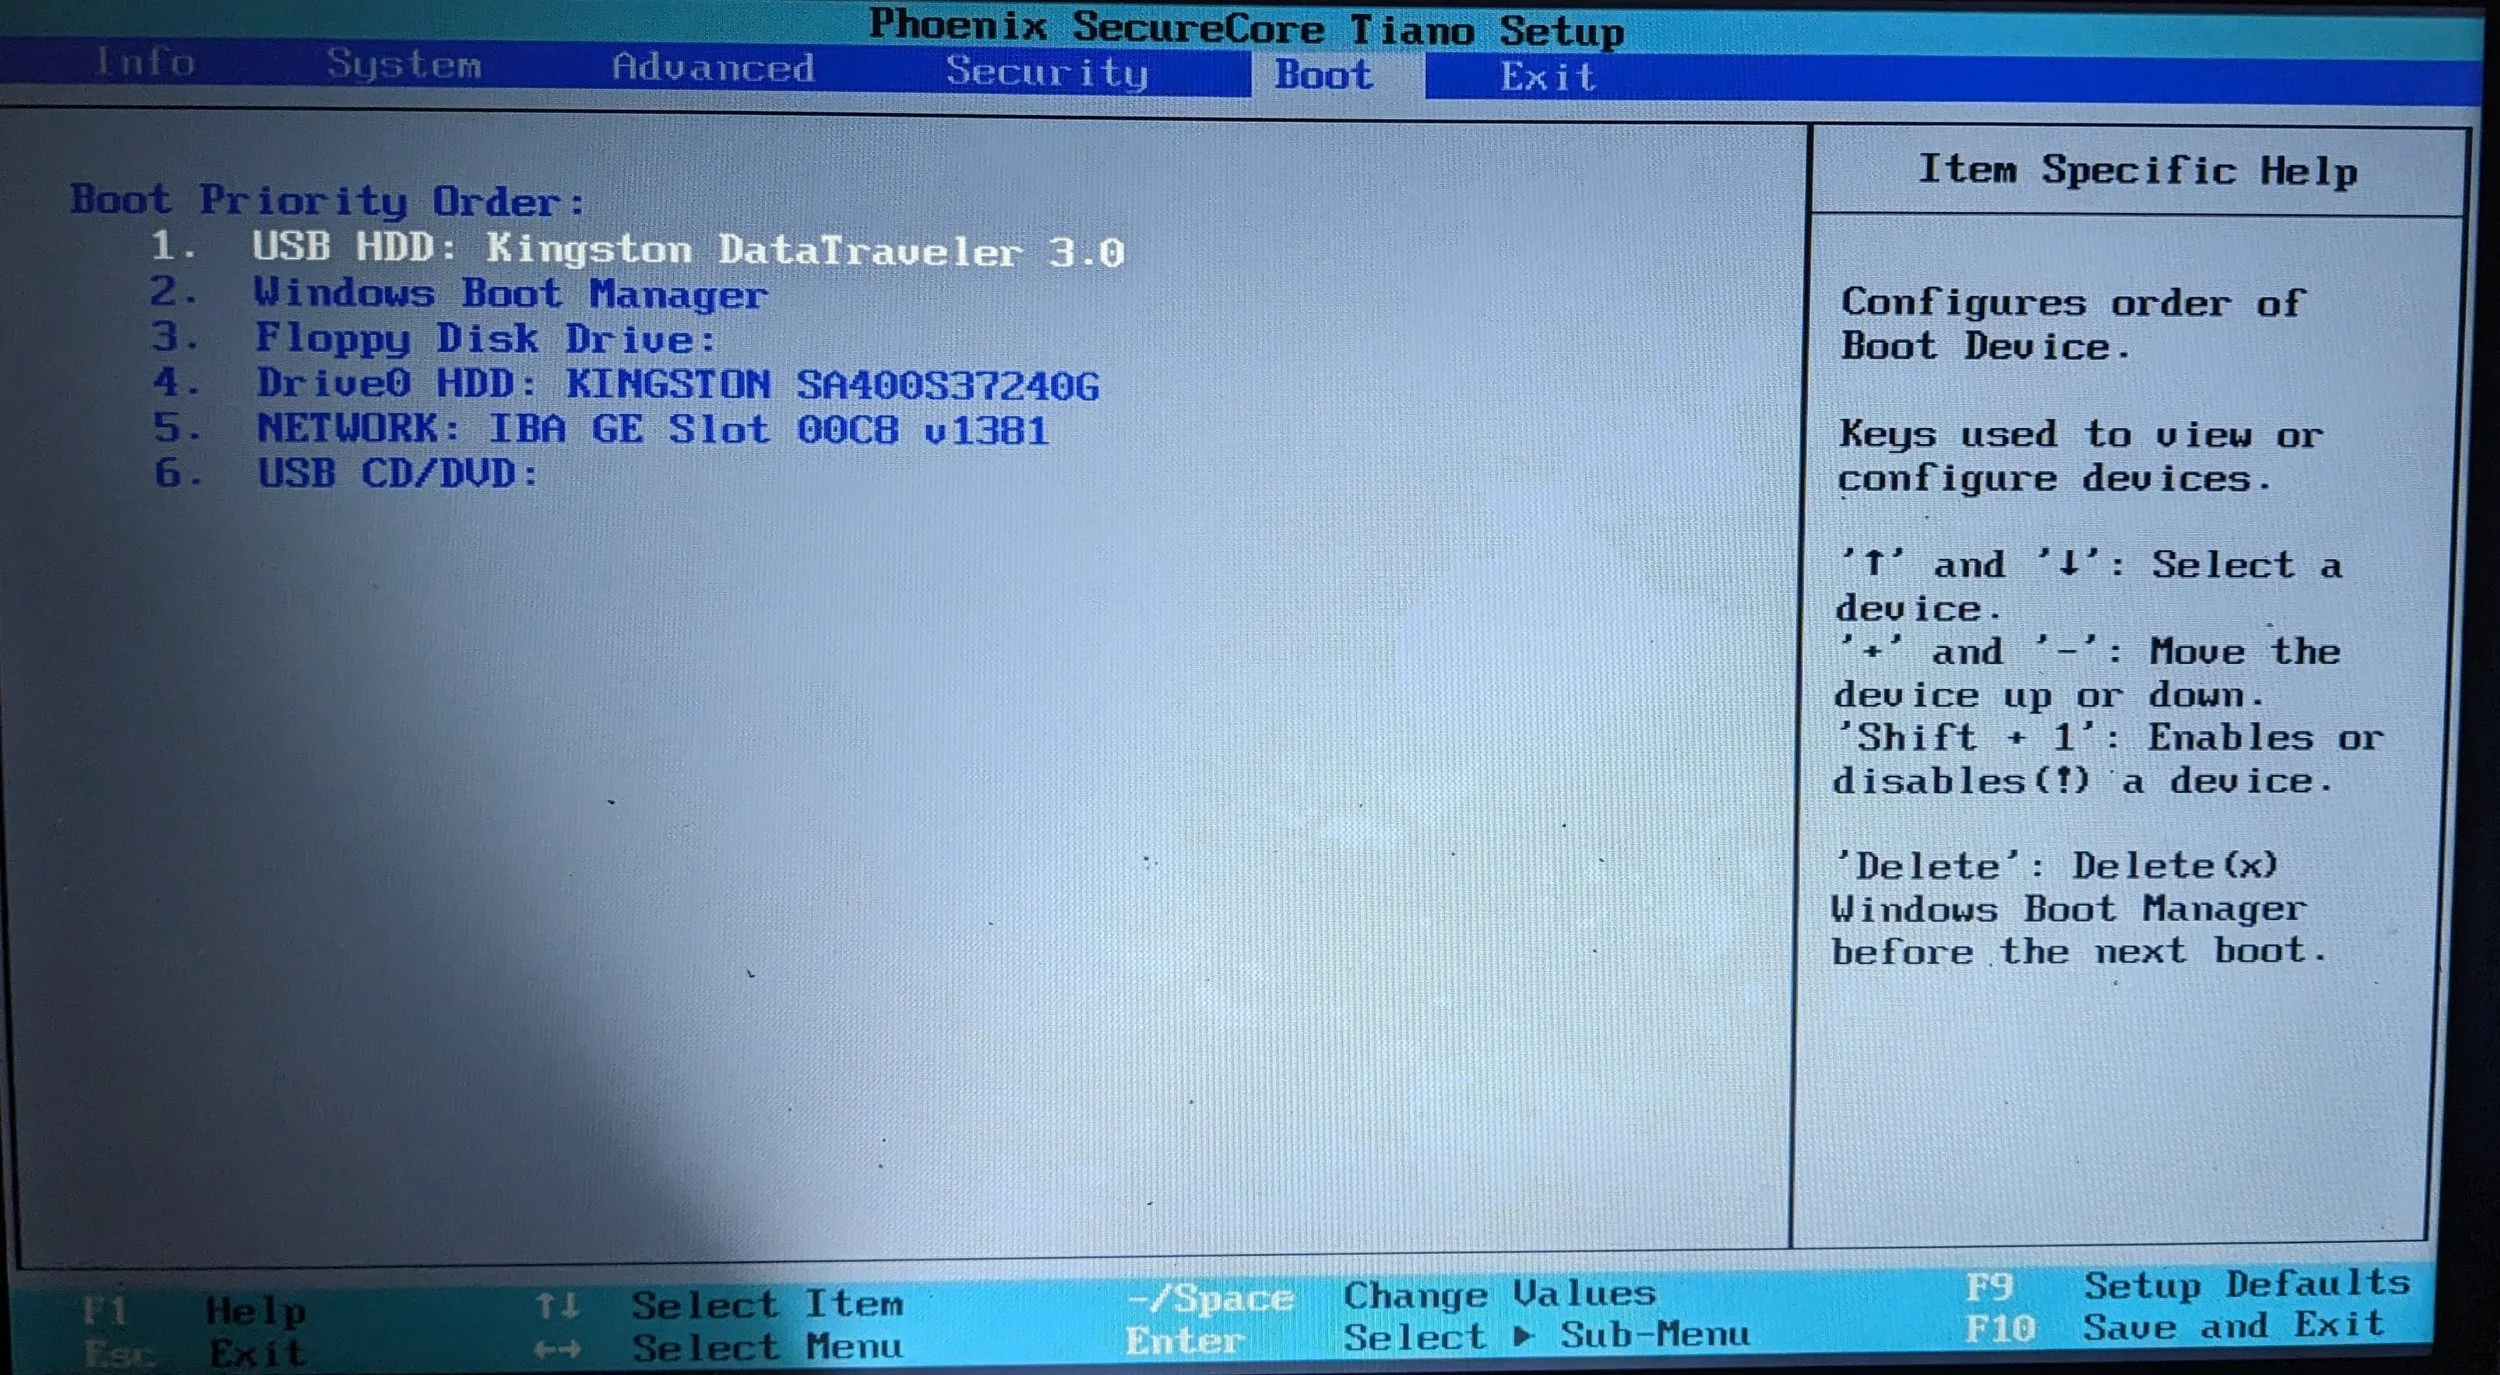
After cloning, install the SSD and test the first boot with the old drive disconnected. That prevents the machine from booting from the wrong drive. When Windows starts, check activation, Windows Update, Device Manager, free space and that the most important files are actually on the SSD.
6. Clean Windows 11 installation on the new SSD
A clean installation is often the tidiest method if you are installing a new SSD anyway. Create a Windows 11 USB from Microsoft, install to the new SSD, run Settings > Windows Update, and install missing drivers from the manufacturer. Do not erase the old drive during setup unless you have verified the backup.
The safest approach is to disconnect the old drive during a clean install if the machine allows it. That lowers the risk of choosing the wrong drive or placing boot files in the wrong location. If the old drive must stay connected, identify the target drive by size, model and partitions before clicking Delete, Format or Next.
When Windows is finished and stable, connect the old drive as an external drive or secondary internal drive and copy the user files. Programs are normally installed again. Remember license keys, Microsoft account, two-factor access, banking, email accounts, browser profiles and specialist software before formatting the old drive.
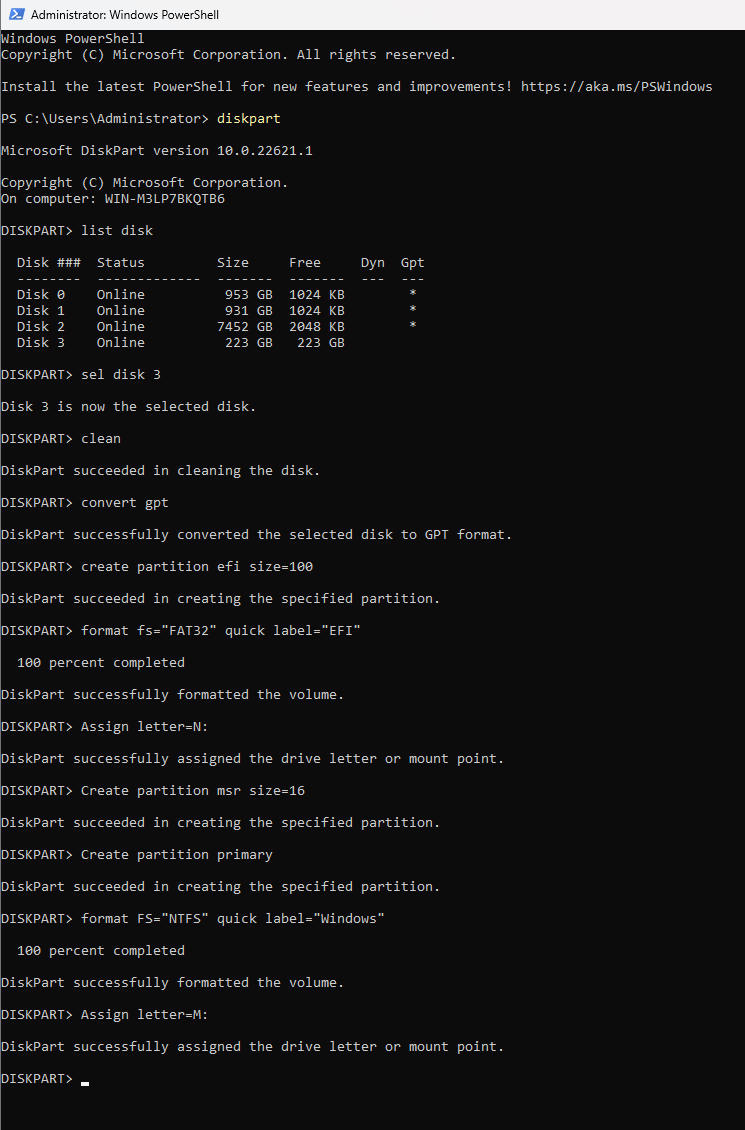
7. Advanced: Diskpart, Robocopy and BCDBoot
There is an advanced method where you create partitions on the new drive with Diskpart, copy Windows files with Robocopy and create boot files with BCDBoot. This is not a normal customer task. Microsoft's Diskpart `clean` command removes all partition or volume formatting from the disk with focus, while `clean all` writes zeroes to the entire disk. Choosing the wrong drive can therefore make data inaccessible within seconds.
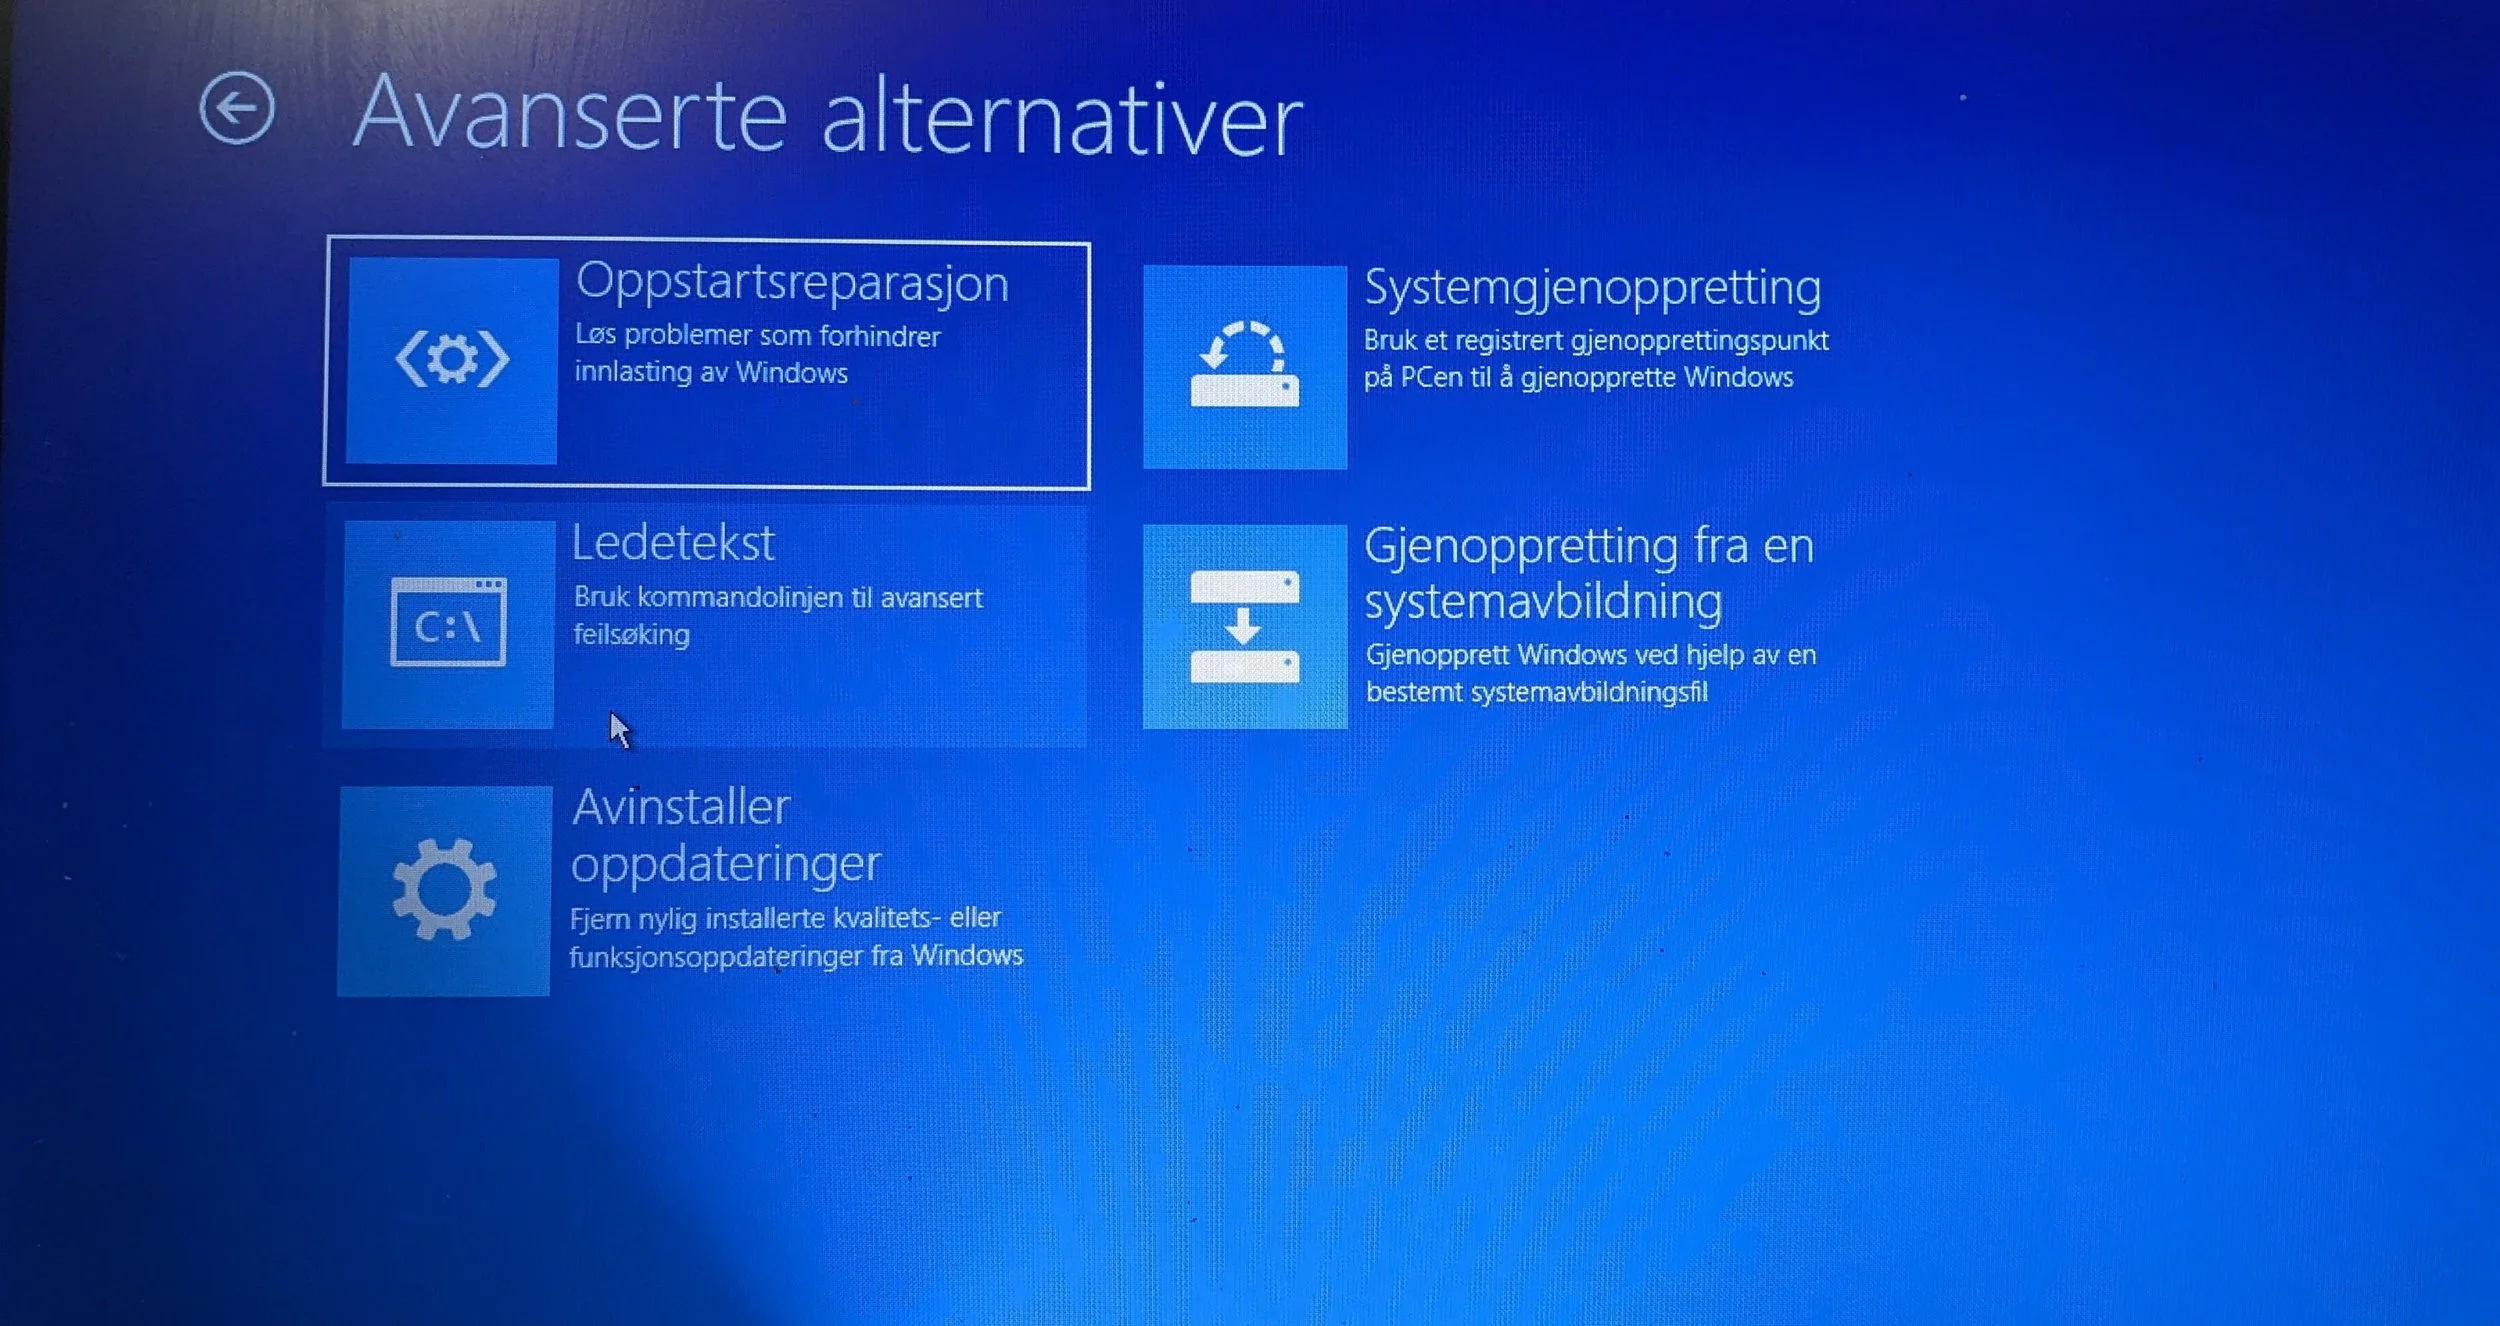
If you work from Windows recovery or an installation USB, drive letters can differ from normal Windows. Do not assume C: is the old Windows drive. Use `list disk`, `list vol`, drive size, labels and checks such as `dir C:\Users` and `dir D:\Windows` before erasing or copying anything.
On a new UEFI/GPT drive, Windows normally needs an EFI partition, an MSR partition and a Windows partition. BCDBoot copies boot files from a Windows folder to the system partition. After file copy, `bcdboot M:\Windows /s N: /f UEFI` can be used to write boot files to the EFI partition, where M: must be the new Windows partition and N: must be the EFI partition, normally FAT32. Do not paste commands blindly if your letters are different.
8. Legacy BIOS, MBR and UEFI
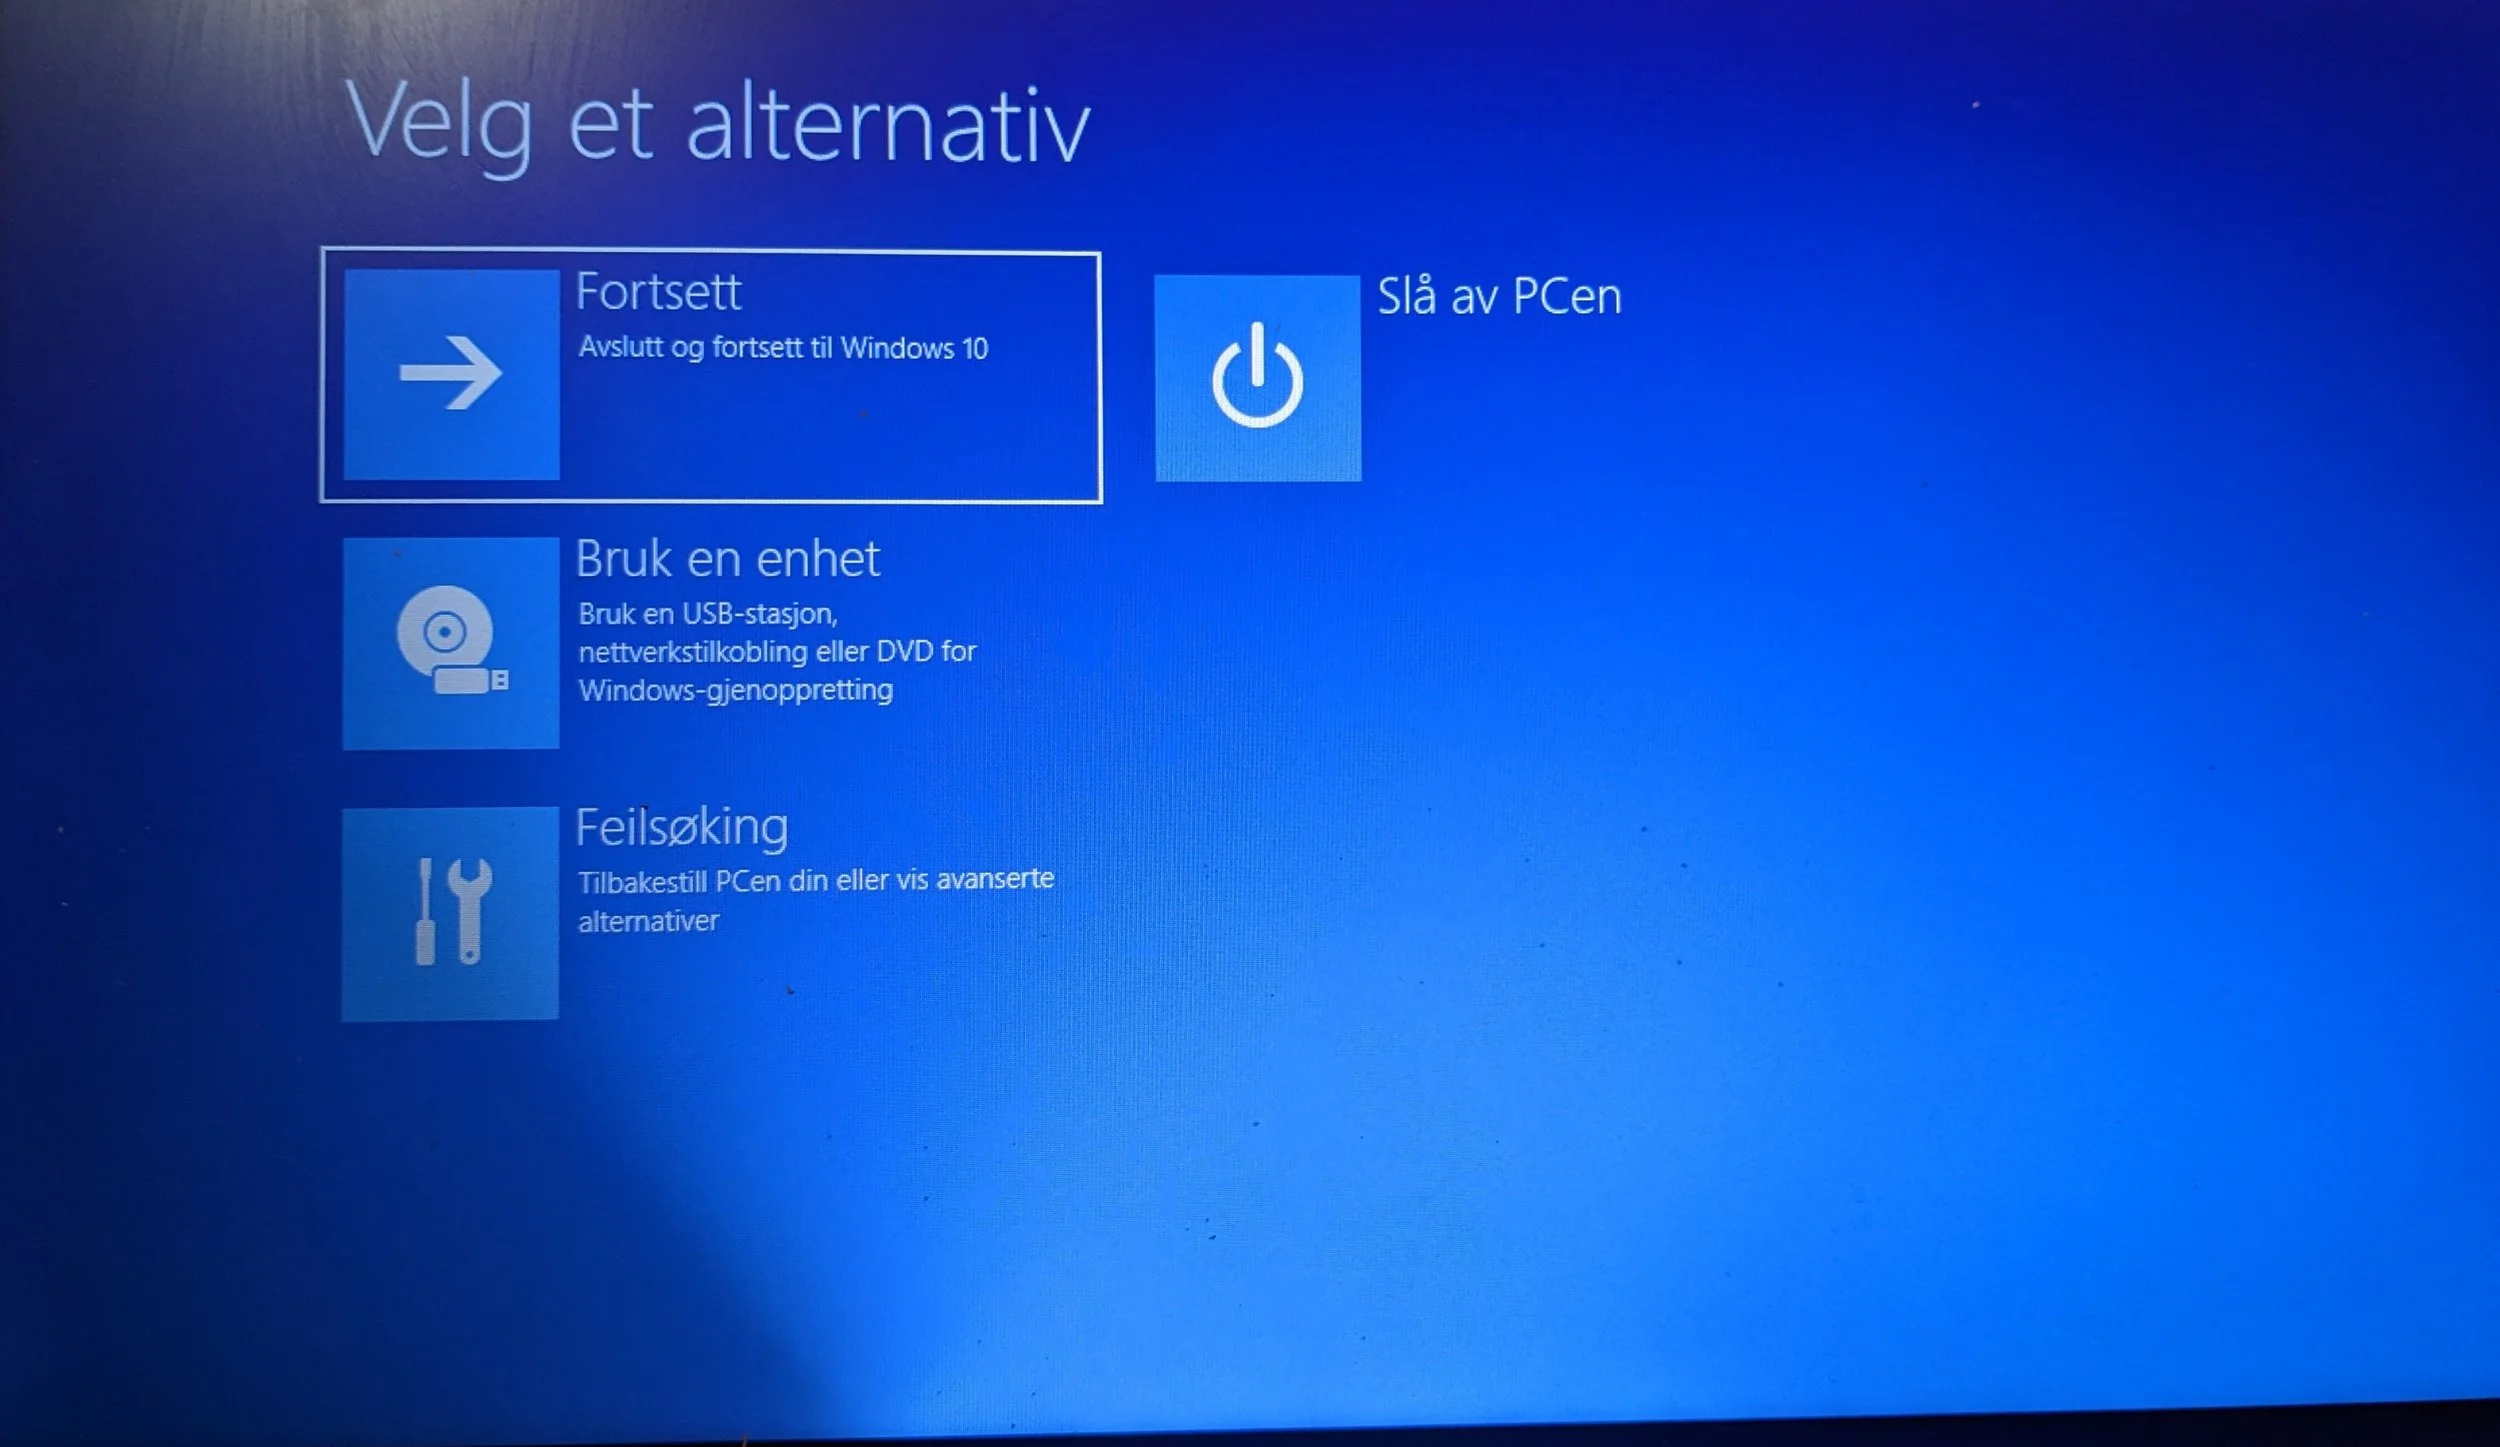
Older installations can use Legacy BIOS and MBR, while modern Windows 11 normally expects UEFI, GPT, TPM and Secure Boot. Microsoft MBR2GPT can sometimes convert an existing MBR system disk to GPT without deleting data, but the tool is for system disks, not ordinary data disks. Always start with `mbr2gpt /validate /disk:0` and convert only if validation succeeds. From normal Windows, conversion requires `/allowFullOS`; from Windows PE/recovery, use it without that addition.
After a successful conversion, firmware must be set to UEFI for the machine to boot. Microsoft also requires the device to support UEFI before you try. BitLocker must be under control and protection should be suspended before conversion; BIOS changes can otherwise trigger the recovery key. If validation fails, the BitLocker key is missing, or the machine has important files without backup, stop and get an assessment before trying more.
9. Afterwards: do not erase the old drive too early
When the PC starts from the new SSD, check more than just whether the desktop appears. Check activation under Settings > System > Activation, run Windows Update, open Device Manager, and test Wi-Fi, audio, camera, printer, special keys, sleep and the programs the customer actually uses.
Open random documents, photos, PDFs, accounting files and email archives from the new drive. Also check that OneDrive is not only showing cloud placeholders if the PC must work offline. Keep the old drive untouched until everything important is confirmed, preferably for a few days or weeks. Formatting the old drive should be the last step, not part of the first test.
When should a workshop do it?
Bring the machine in if the content is important, the drive shows errors, the BitLocker key is missing, the machine does not start, you are unsure about drive selection, or you are considering Diskpart/BCDBoot without being completely certain. At EasyPC, you get a free diagnosis, and we can tell you whether safe file copy, cloning, clean installation, data recovery or SSD replacement is the right path.